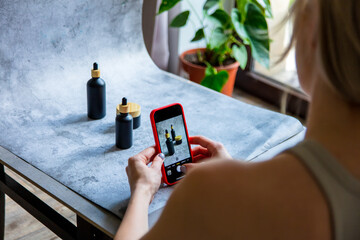
The quality of product photography plays a major role in your brand’s first impression. High-quality photos will contextualize a product and inspire potential buyers to purchase.
If you’re an eCommerce seller, you probably know that lighting makes or breaks your product photos. Even a good DSLR camera or smartphone can produce amateurish-looking images if you light them incorrectly. Lighting is both an art and a science, and learning how to control it is essential for capturing eye-catching products that sell.
The first step in lighting product photography is deciding what kind of look you want to achieve. Do you want a clean and bright look or something more dramatic? Do you want to show off your products’ texture? These are just some of the questions you need to ask yourself.
Once you know what kind of look you’re going for, it’s time to start experimenting with different lighting techniques. You’ll want to use a variety of lights and lighting modifiers, such as a softbox or reflector, in order to get the best results. The type of light you choose will depend on the style of image you’re trying to create, as well as your budget.
When deciding on your lighting setup, keep in mind that the quality of the light will impact the tone and emotion of your final product photos. For example, direct sunlight is luminous, but it’s also harsh and can cause unwanted reflections on your products.
It’s important to experiment with the placement of your light as well. For example, if you’re shooting your product head on, try taking a few images from the side and then from the back. This will help you determine which angle is the most flattering for your product.
Another thing to keep in mind is that the position of your light will affect the depth of field of your image. If you’re using natural light, the sun will move across the sky throughout the day, changing the position of your light. So it’s important to check the weather forecast and be ready for changes in lighting throughout the day.
Finally, it’s essential to have a few reflectors on hand, regardless of how many lights you use. These will help you to fine-tune the lighting and eliminate any shadows that might be present on your product.
Props
When it comes to product photography, props are all the things that surround a specific scene. They help in establishing the mood and tone of the image and also give some context to the main subject. They can also be used to present a captivating story that entices buyers. Props can be anything from furniture, light, balloons, cars, books, toys, colorful origami and much more.
When choosing props, it is important to think about the type of look you want for your images. For example, if your product is for a natural skincare line, you might want to use natural elements in the photo, such as moss or wildflowers. Alternatively, if you are selling makeup products, you might want to use bold and bright colors as your backdrop.
One of the most important purposes of product photography is to evoke a feeling in consumers. This is especially true when you are selling online, because consumers cannot touch or try out the product in person. It is essential that you use props to create a positive emotion in your customers, so that they feel confident purchasing your product.
For example, using a colorful magazine as a backdrop can add color and texture to your photos. This will make the products you are photographing stand out from the background and make them look more appealing to potential customers. You can also use props such as trays to display your products or food on. This will help to keep the image clean and professional.
If you are photographing a luxury item, such as a dress or shoes, it is also helpful to include some creative props to help your audience envision themselves wearing the clothing or using the shoe. This is a great way to plant an idea in the consumer’s mind that will influence their buying decision.
Another type of creative prop is a mirror. This is not only a practical prop for checking makeup, but it can also be used to create a unique and interesting composition in your product photo. You can even use it to create a mirror effect in your image by placing the product in front of a small mirror and then rotating the prop until you have the desired composition.
Angles
There are a variety of angles that can be used in product photography, depending on what type of look you’re going for. The most basic angle is the front view, which captures your product from eye-level. This is important for products such as clothing, shoes, and bags. It shows off the details of the product and gives shoppers a good idea of what it will look like in their hands.
Another popular angle is the top-down view, which is great for showing off a product’s unique texture and features. It can also add depth to a product by placing the foreground in focus and the background out of focus. This type of shot is ideal for apparel and textured products, but it can also be used for larger items such as furniture and appliances.
The low-angle shot is captured by keeping the camera at the bottom level of the product or by kneeling down a bit. It’s the perfect way to show off a new or unique feature of your product and can help customers imagine how it would fit into their home or office. This is a great angle to use for apparel and accessories that will be worn by the customer, but it can be used for any physical product.
A profile angle is a good choice for products with side details or that have a certain amount of volume or girth. This type of shot can be helpful for footwear, apparel with cuffs and collars, and storage products that have side compartments. It is also a good angle to use when shooting wearable products on models.
The Dutch angle shot is a fun way to add a touch of artistic flair to your shots. It involves tilting the camera to create an angle that makes the subject seem more three-dimensional. It’s a good idea to use this angle with an image that will be zoomed in, as it can add a lot of depth to a small area. You can also experiment with other camera movements, such as a medium close-up and a gentle pan, to bring more attention to specific product details.
Editing
Product photography is the foundation of an ecommerce store. Whether it’s a clean-cut, white background product photo or a lifestyle shot that shows the product in use, it helps potential customers make informed purchasing decisions. It’s also the key component that differentiates you from competitors who have similar products.
The editing process in product photography can be daunting, but it’s the most important step of the whole process. Without it, your photos will never be ready for ecommerce. During this stage, you’ll make adjustments to the brightness, contrast, saturation and color temperature of each image. You may also apply sharpening and noise reduction. Lastly, you’ll adjust the size of the image for specific websites or platforms.
When it comes to colors, you want them to be vibrant and juicy but still close to true-to-life. Too much vibrance and saturation looks dated and overdone, while too little can make your images look dull. It’s important to test your edits on a small sample of each image before applying them to the rest.
Another common adjustment in product photography is sharpness. However, be careful with this because too much sharpness can start to look crunchy and weird. To avoid this, try using a higher radius value or even a feathering effect.
If you’re shooting in a studio, it’s a good idea to have black and white cards on hand. These can help you control shadows and highlight in a white-on-white scenario, and they’re useful for managing reflections as well.
Finally, it’s a good idea to batch process your photos if they need similar changes. This will save you time and effort. In Lightroom, for example, you can select all of your photos and make the necessary adjustments with just one click.
Product photography can be challenging but it’s a critical part of any online business. High-quality, professionally edited product photos can help your brand stand out from the competition, increase conversions and drive sales. This is especially important for ecommerce, where shoppers are highly visual and often compare products before making a purchase decision. With the right technique and equipment, you can create professional-looking product photos in just a few steps.
